This post may contain affiliate links. I will receive a small commission if you use these links.
What started as an alternative to the classic meal options for my daughter’s graduation party turned into a nice little side gig. Everyone was so impressed, they started asking for help doing a table of their own at their events. What the heck am I talking about? Grazing table? Charcuterie board? Are you lost? Well follow me for some answers.
A charcuterie board…Sounds fancy right? It’s generally a wood board (about the size of a large cutting board) filled with all types of goodies such as a variety of cheeses, cracker, meats, fruits, nuts etc. Yummy right? It is! You can get as creative as you want with them. There is even a restaurant here in Syracuse that serves all their dishes this way…on a board! Pretty impressive if ya ask me. Okay okay enough with the charcutie talk, on to bigger and better things. The Grazing Table.
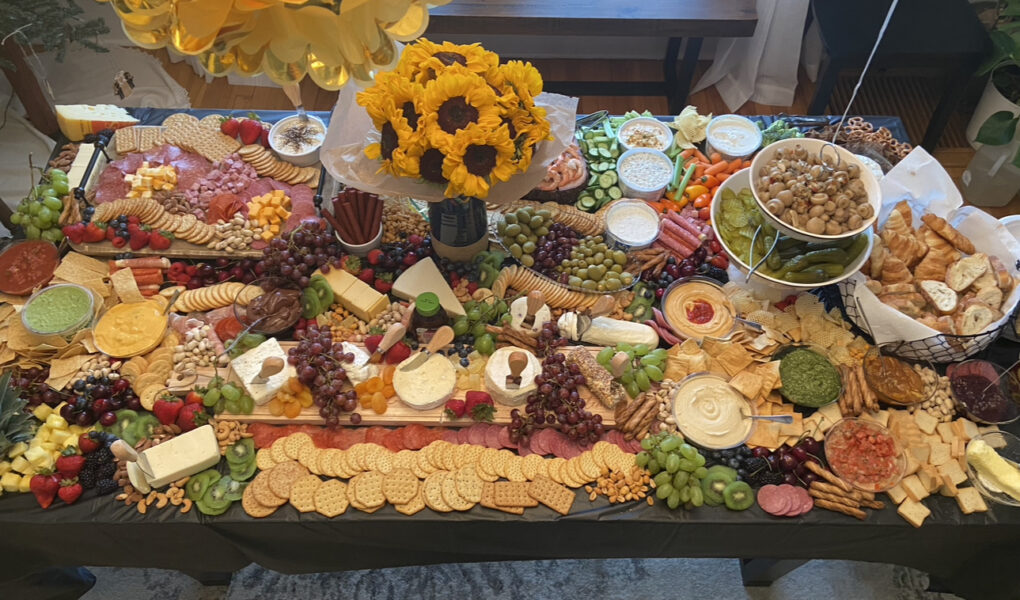
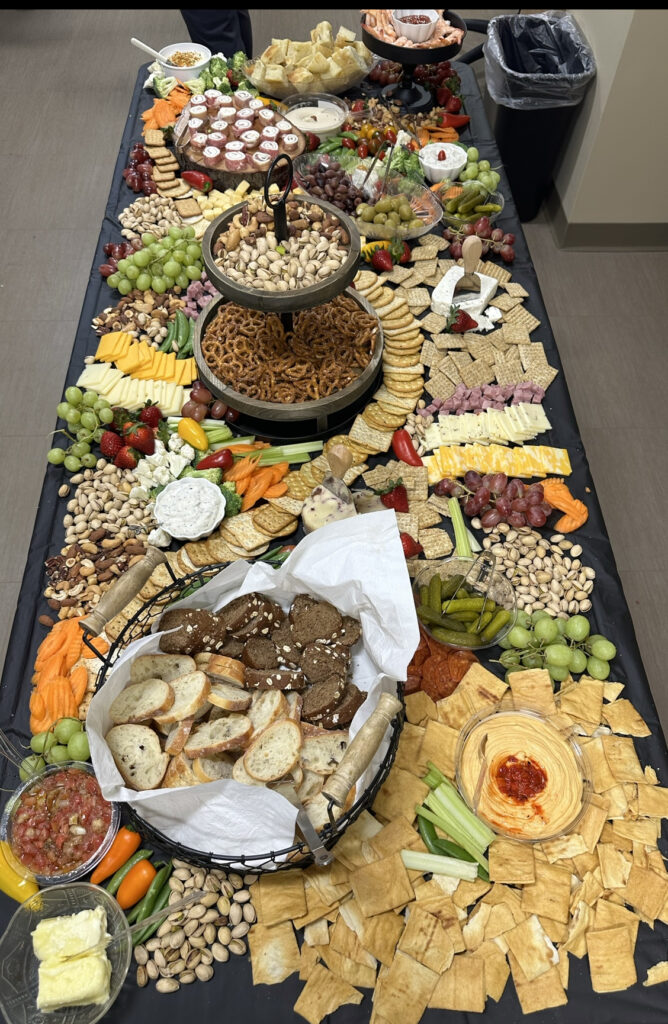
The grazing table is not only a work of art but it’s a delicious meal. Yes, a meal. You can make any themed grazing table you want! Tacos? Yep. Chili? Yep Brunch? Yep. The grazing table is exactly how it sounds, you graze. Start with the basics of a charcuterie board and then you just keep adding on.
I was trying to come up with ideas for my daughter’s graduation party. We didn’t want the typical all-day event. My house is fairly small and it would be difficult to host a lot of people at once. We thought a drop-in style party was the best option. Then we started thinking about food. We needed something to feed everyone but over the course of a few hours. I didn’t want to tie myself up at a grill on in the kitchen the entire time. Catering was not an affordable option. So, what do you do? Not going to just serve snacks-or are we?
My mind was racing with ideas. I started brainstorming every type of snack and appetizer I could think of. I shopped over the course of a few weeks, picking up things here and there. This table was stunning. I have never received so many compliments on anything before. I can tell you that no one, I mean no one left hungry. I even sent a plate with them. There were 40-50 guests that stopped by. It was such a hit, I have made a few more for other events. If you want to make a jaw dropping impression on the guests at you next event, check out my tips and List of ideas.
1. Tools needed: A variety of multi-tiered serving dishes and trays. You don’t want all the food on one flat surface. I found a few cute ones at Hobby Lobby and on Amazon. You can also pick up dishes at the Dollar Store for sauces and dips or other wet items like olives. You will also need a plastic disposable table cloth (Black seemed to work the best). You will lay this down and place the food directly on it. Easy clean up. When you are done, you just roll up all the tid bits that are left and toss them out! You want a variety of serving spoons, knives for the cheese and small tongs for other items. I picked a set up on Amazon that had all of them. You can grab it here.
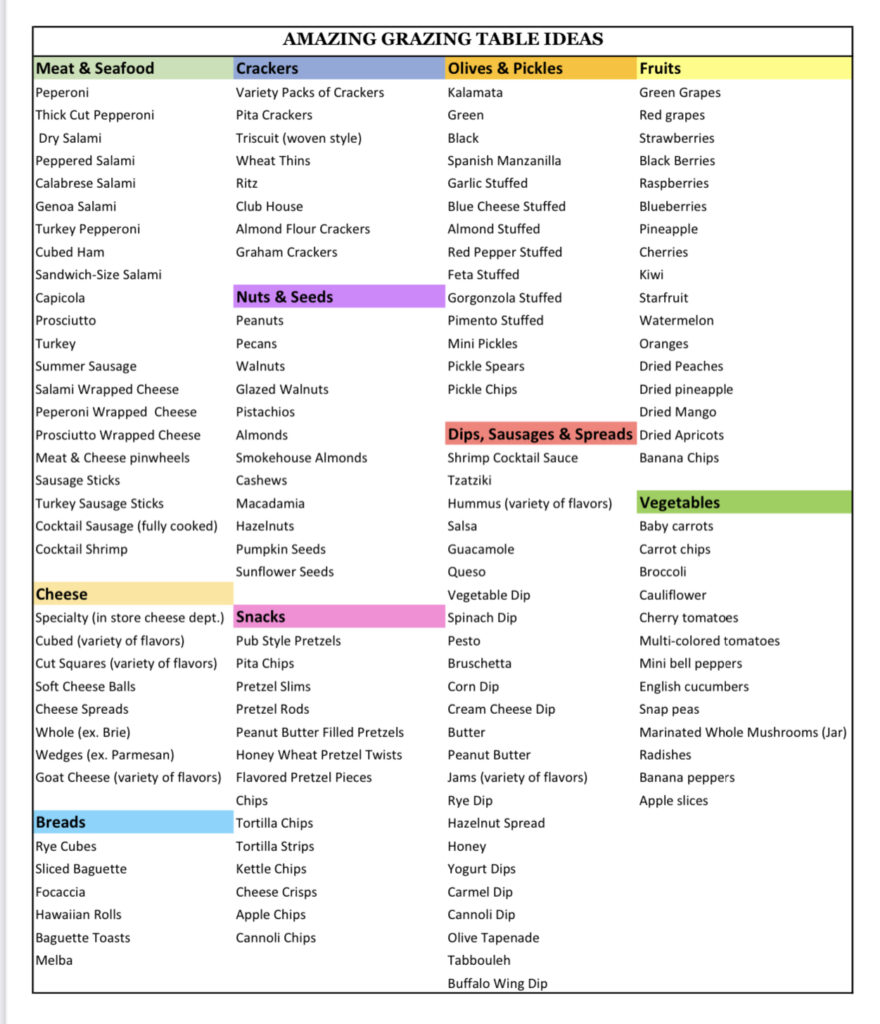
2. Making the list of food (and checking it twice): This is the most difficult task when it comes to the grazing table. You will have to judge how much food depending on how many people. It is also important to think about food allergies when you place the items. All stores have a different selection so you may want to scope out things before you decide where to buy the items from. I shopped for items at several stores including Aldi, Wegmans and BJS. This takes some planning. You want to have a large variety of food (you may only use some of each thing) so that there are many choices. The goal is to not see the table cloth once it’s all set up. One tip I learned is, have a lot of small things like nuts to fill in at the end. Here is a list of ideas to make your shopping list from.
3. The Set-Up: The big event is here! Panic sets in-don’t panic. Give yourself an hour to set it all up. The goal is to cover the entire table so all you see is food (well and of course trays). Place the trays and first. Then place any decorations such as flowers. Put the cheeses in different areas of the table. Try to think ahead which cheeses, meats and crackers would complement each other. Once the cheeses are in place. You want to weave all the types of crackers around the cheese and across the entire table. You can get fancy with a design or create a shape or letter with them. Then you place the meats somewhere near the cheeses you previously decided on. You can get really creative with these. There are tons of YouTube videos showing how to make flowers and other designs out of meat. Next, place the red and green grapes on the stems in various areas. Lastly, fill in one thing at a time. Try to keep complimentary items near each other such as vegetables and dip or bread and bruschetta.
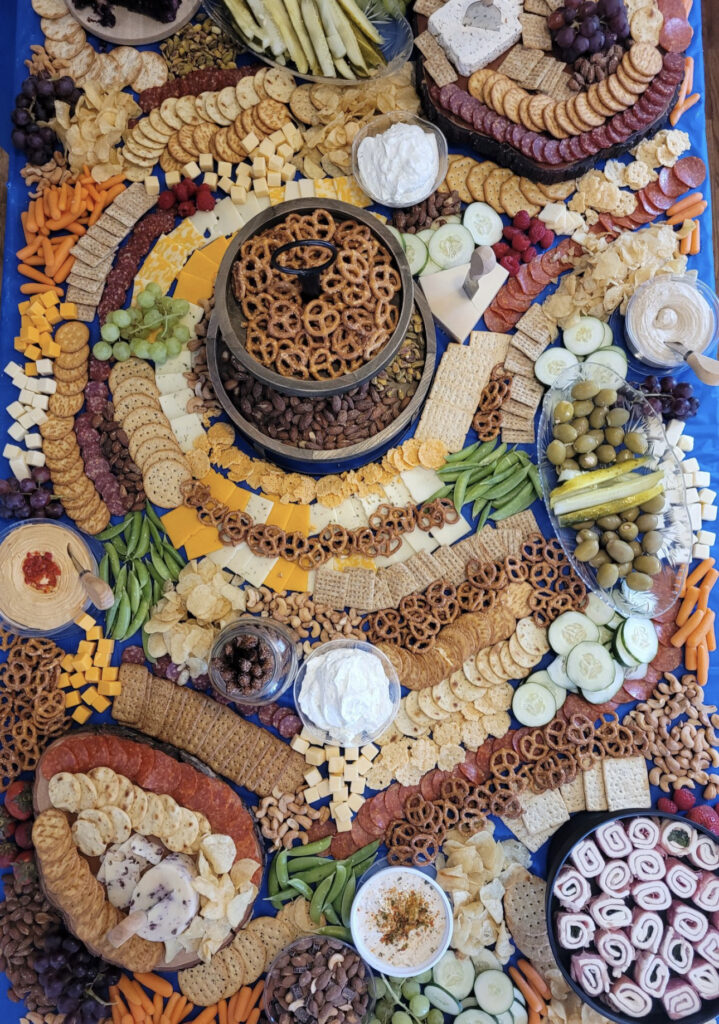
4. Finish Strong: Once you have the majority of the food on, fill in gaps with small items like little piles of nuts, cubes of cheese or small fruit such as strawberries. Remember, there is no wrong way to set it up. Each table is different and yet they are all just as stunning. Place plates, napkins and silverware close by but not on the table with the food. Take a step back and admire the amazing presentation you completed- then enjoy!
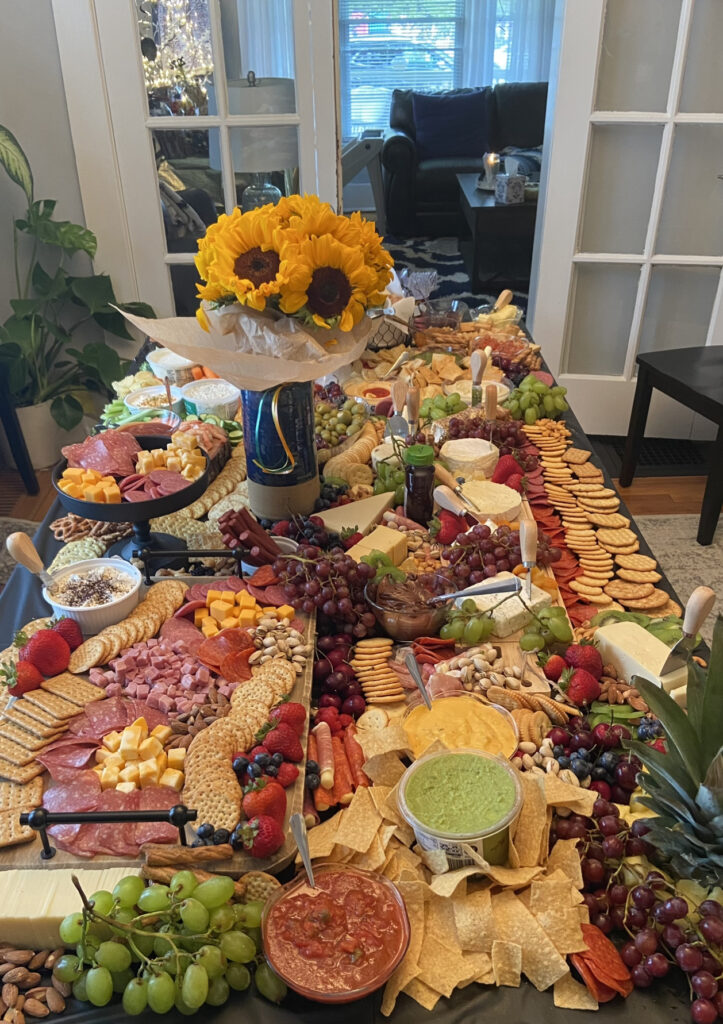
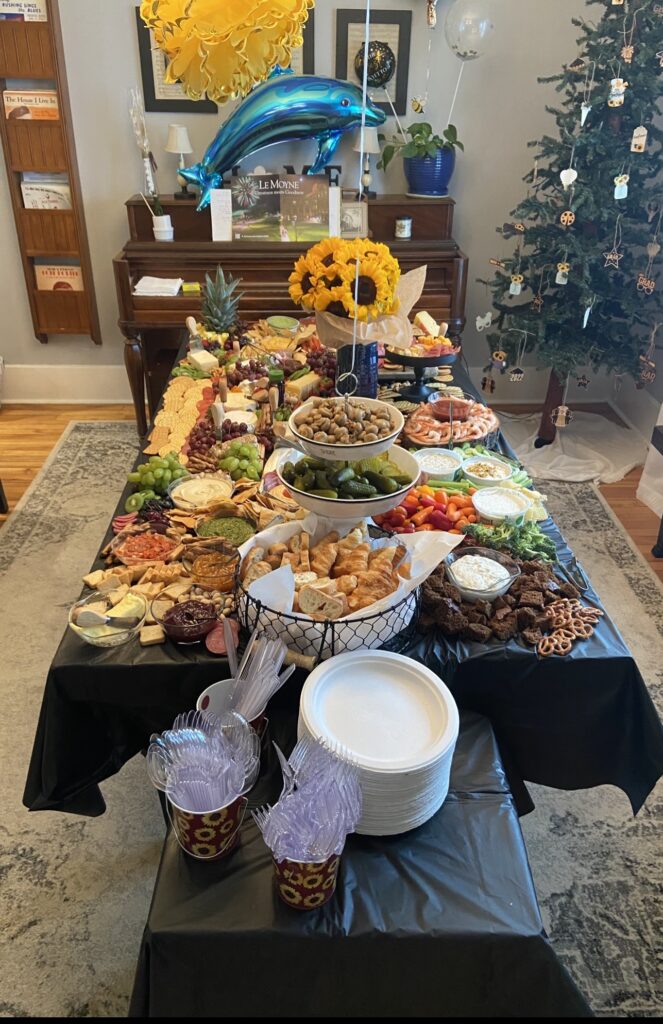
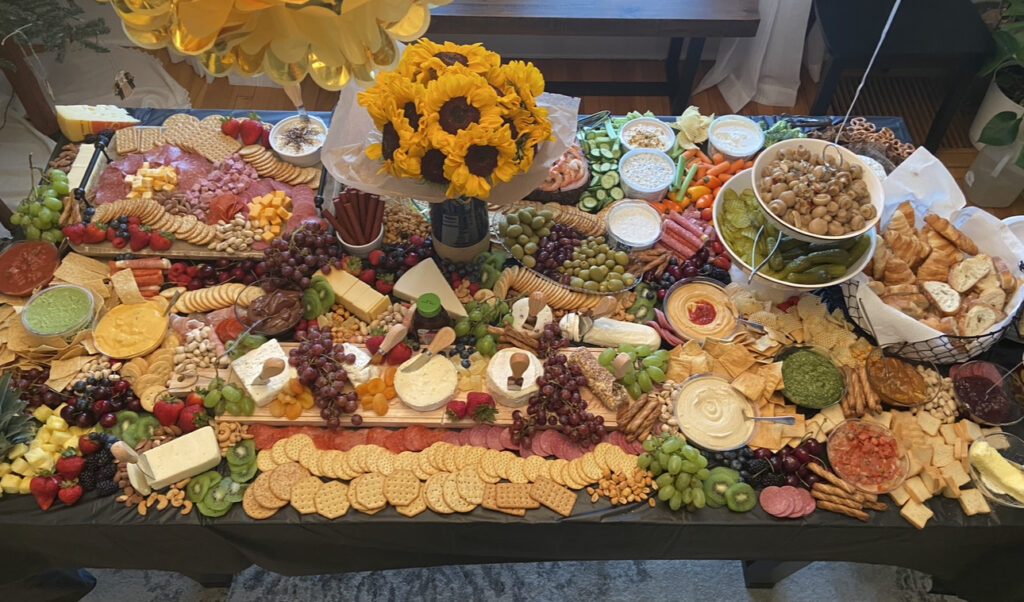
5. Clean-up: Well, this is the easy part. Pack up whatever you want to save, send a plate home with your guests and wrap up what’s left in the table cloth. Your grazing table will be the talk of the town!
Comment if you have any questions or want to share you amazing grazing creations! I shared a list several of the foods that I have had on the tables I have done. Get creative!
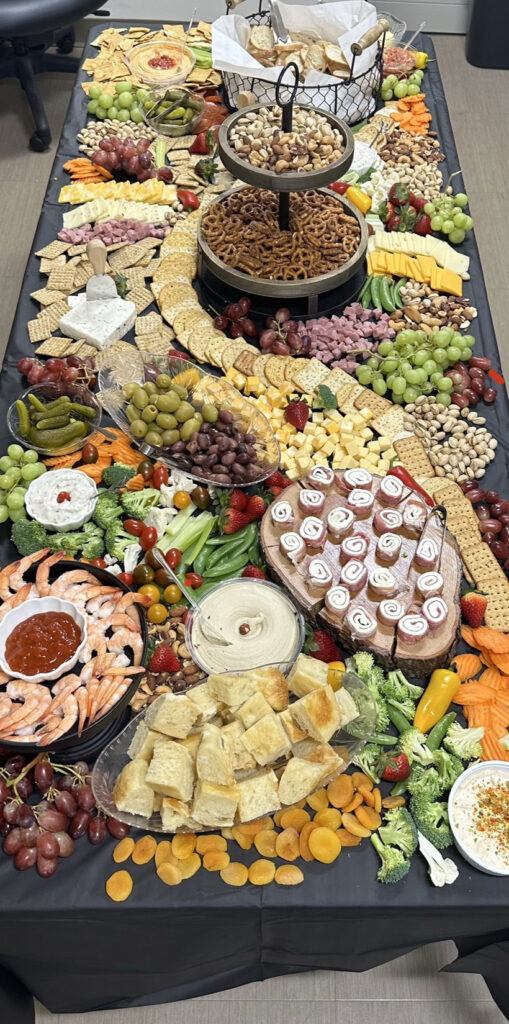
~ Passionate Pisces
